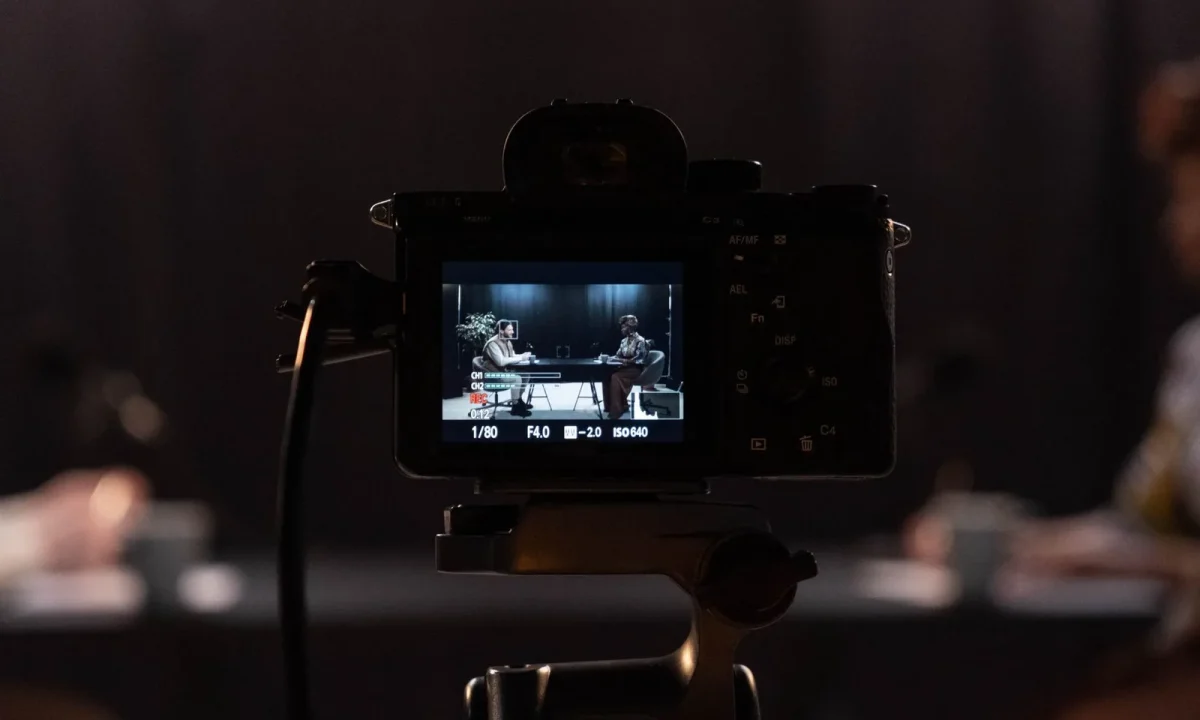
A teleprompter for interviews gives beginners a reliable safety net: your questions, guest names, and key talking points stay in sight while you keep your eyes on the lens and your attention on the conversation. Stepping in front of the camera for an interview can feel intimidating, but a prompter removes the pressure of memorizing every detail so you can focus on listening and reacting. This guide walks content creators, video producers, public speakers, and educators through the basics of choosing a prompter setup, writing readable scripts, and practicing until the technology disappears into the background. Along the way you will see how the same habits translate to a teleprompter for presentations and a teleprompter for vlogging, so the skills you build here keep working long after your first interview.
Why Beginners Benefit From a Teleprompter for Interviews
Keeping eye contact while staying on track
Eye contact is one of the fastest ways to build trust with an audience, and glancing down at notes breaks that connection instantly. A prompter lets you read your prepared questions and follow-up prompts while your gaze stays near the lens, which makes viewers feel like you are speaking directly to them. Because the text sits at the same height as the camera, the shift between reading and listening is barely noticeable on screen. This matters even more when you are interviewing a guest, since you need to watch their reactions as closely as you watch your own script. The result is a conversation that feels present rather than rehearsed, even when every word on your prompter was carefully planned.
Reducing nerves with a visible script
Interview nerves rarely come from the conversation itself; they come from the fear of forgetting something important at the worst possible moment. Seeing your structure in front of you acts as a calm, continuous reminder that you already know where the discussion is headed. Beginners often report that simply having a visible plan lowers their heart rate before the recording starts, because the unknown shrinks to a manageable list of lines. Treat the prompter as a confidence aid rather than a crutch: it supports your preparation instead of replacing your judgment. When you trust that your talking points are safe on screen, you free up mental space to improvise follow-up questions naturally.
Staying consistent across multiple takes
Interviews frequently require re-recorded segments, edited introductions, or retaken answers when audio fails, and consistency between takes is hard to maintain from memory. A prompter keeps your wording, key statistics, and guest titles identical across every take, which saves your editor hours of matching clips later. It also helps when you record several interviews in a single session, because your opening and closing formulas stay exactly the same without deliberate effort. Consistency builds a recognizable voice for your channel or program, and audiences notice that stability even if they cannot articulate it. For beginners, this is one of the quietest but most valuable benefits of the setup.
Choosing the Right Prompter Setup
Software, phone, tablet, and desktop options
At its simplest, a teleprompter is an app that scrolls text at a speed you control, and that app can run on almost any screen you already own. Phone apps are the most portable option and work well for sit-down interviews where space is limited, while tablets give you larger text that is easier to read from a short distance. Desktop or laptop software is useful when you are recording in a studio and want a bigger display positioned behind or beside the camera. The right choice depends on your interview format, your budget, and how much shooting space you have, so test each option in your actual recording environment before committing. If you are still comparing devices and apps, the guide Which Teleprompter for Video Formats Fits Your Project? offers a structured way to weigh those trade-offs.
Hardware: stands, beam splitters, and camera rigs
Software alone puts text on a screen, but hardware determines whether your eye line looks natural on camera. A basic stand holds your phone or tablet just below the lens, which is an affordable starting point for beginners who want to test the workflow. A beam splitter rig places a sheet of reflective glass in front of the lens so you read directly through the camera itself, producing the most convincing eye contact. Camera-mounted kits fold flat for travel and are popular with on-location producers, while freestanding rigs suit fixed studio setups. Whichever route you take, prioritize stability: a wobbly prompter distracts you more than no prompter at all.
Free versus paid tools for first-time users
Free apps cover the essentials—scrolling text, adjustable speed, and a mirror mode for reflective glass—and they are more than enough for a first interview. Paid tools typically add remote controls, voice-activated scrolling, cloud sync, and more precise formatting, which become valuable once you record frequently or work with a team. A sensible approach is to start free, learn where the limits actually bite you, and only upgrade when a specific feature solves a problem you have already felt. Remember that the costliest setup will not fix a poorly written script or a rushed rehearsal, so invest in practice before you invest in gear. For a broader look at how these options compare, see Which Teleprompter for Video Formats Fits Your Project?.
Writing a Script That Reads Naturally on Camera
Short lines, plain language, and natural pauses
Scripts written for the page rarely survive contact with the camera, because long sentences force you to scan ahead and make you sound breathless. Keep each line short enough to read in a single glance, use everyday words, and leave room for pauses where you would naturally breathe. A useful rule of thumb is to write exactly the way you would speak to a colleague sitting across the table from you. When you read a sentence aloud and it sounds stiff, rewrite it until your own voice comes back. For a deeper treatment of script rhythm and formatting, the resource Mastering Teleprompter Usage expands on these drafting habits.
Marking names, numbers, and pronunciation cues
Nothing derails an interview faster than mispronouncing a guest’s name or fumbling a figure you were supposed to state confidently. Solve this before the recording by adding phonetic hints, capital letters, or simple notes in brackets right inside your script. If a title is complex, write it out exactly as you will say it rather than trusting yourself to reconstruct it under pressure. Do the same for dates, product names, and technical terms that are easy to mix up when you are nervous. These small annotations cost you ten seconds to add and can save an entire take.
Cueing questions so you never sound robotic
A prompter should guide the conversation, not flatten it, so format your questions as spoken prompts rather than formal interrogatives. Use markers such as Q1, FOLLOW-UP, and PAUSE for answer so you always know where you are in the flow even if your guest takes an unexpected turn. Leave blank space after each question to remind yourself to stop reading and start listening. When you reach a follow-up, glance back at the screen, pick up the cue, and return your eyes to your guest. This rhythm keeps the exchange lively while your script quietly keeps you on schedule.
Setting Up Before You Record
Positioning the prompter at eye level
The single most important setup decision is height: place the text as close to the lens as your rig allows and at the same eye level as the camera. When the prompter sits too low, your gaze drops visibly and the audience reads it as disengagement; when it sits too high, you appear to stare upward. Sit in your actual interview chair, adjust the stand until your eyes meet the camera naturally, and lock everything in place so nothing shifts between takes. Mark the floor or table position with tape if you are working in a rented space, because recreating the setup later is much easier with a physical reference.
Testing scrolling speed and font size
Scroll speed should match your natural speaking pace, so the text arrives exactly when you are ready for it rather than piling up or leaving you waiting. Do a timed read-through of your opening section, then adjust the speed until you never have to rush or stall. Font size should let you read comfortably from your seated position without squinting, and line length should stay short enough that you do not have to track across a wide screen. Public sources on interview production commonly suggest practicing at a slightly slower speed than feels urgent, because a little extra margin prevents panic mid-sentence. Re-test after any change to lighting or distance, since both affect how clearly you see the text.
Lighting, audio, and framing checks
A prompter is only one part of the signal chain, and a perfect script will not save a shot with muddy audio or an unflattering angle. Run a short test recording to confirm your exposure, white balance, and framing before your guest arrives. Check that no stray light reflects off the prompter glass, since glare can wash out your text and create a visible hotspot in frame. Record ten seconds of room tone and a spoken line so you can verify levels before the real conversation begins. Completing these checks in the order described in Teleprompter for Video Formats: A Step-by-Step Workflow keeps the pre-recussion phase calm and repeatable.
Practicing Your Delivery on Interview Day
Warm-up reads and breathing routines
Arriving at your first read with cold vocal cords produces flat delivery, so spend five minutes warming up before the camera rolls. Read your opening paragraph aloud several times, then move on to a slower pass where you exaggerate your pauses. Pair this with slow breathing—inhale for four counts, exhale for six—to settle your heart rate and keep your shoulders from creeping upward. A warm-up also reveals clunky lines you did not notice while editing the script on paper. Treat it as a non-negotiable part of the setup, exactly like checking your audio levels.
Using hand gestures without breaking pace
Many beginners freeze behind a prompter because they are concentrating so hard on scrolling text that their hands disappear from frame. Give yourself permission to gesture: mark two or three moments in your script where a natural hand movement would emphasize a point. Practice those moments during rehearsal so the gesture and the line land together instead of competing for attention. Small, controlled movements make you look more engaged, while rigid stillness can read as discomfort. The goal is to look like someone having a conversation, not someone operating a machine.
Recovery techniques when you lose your line
Losing your place happens to everyone, and the recovery matters far more than the slip itself. When it occurs, stop, take a short breath, and glance back at the prompter rather than filling the silence with filler words. If the line is critical, simply repeat it from the beginning; editors can trim the false start in seconds. A calm recovery signals confidence, whereas panicked rambling draws attention to the mistake. Build one recovery rehearsal into your practice session so the technique feels familiar when you need it live.
Common Beginner Mistakes to Avoid
Reading word for word instead of speaking
The most frequent error is treating the script as prose to recite rather than a map for conversation. When you read verbatim, your cadence becomes monotonous and your eyes lock into a scanning pattern that viewers instantly recognize. Instead, read a line, look up, and deliver it in your own words, using the prompter as an anchor rather than a teleprompter in the theatrical sense. This small shift restores vocal variety and makes your on-camera presence feel far more natural. The same principle underlies the advice in Avoiding Common Mistakes with Teleprompters for Video Formats, which covers version-specific pitfalls in detail.
Placing the prompter too far from the lens
A prompter positioned several inches or feet away from the camera creates a visible drift in your eye line, and viewers sense that you are looking past them. As a general rule, mount the device as close to the lens as your hardware permits, because the smaller the gap, the more convincing the direct address. If your rig forces distance, compensate by keeping your glances brief and returning to the lens quickly between lines. Check the gap on a recorded test clip rather than trusting your impression in the room, since the lens exaggerates separation. Fixing this one positioning detail often transforms how professional your finished interview feels.
Skipping a rehearsal with your guest
Rehearsing alone confirms your own delivery, but it cannot predict how your guest will respond to your pacing and question order. Run a five-minute dry session with them where you test names, transitions, and the flow of follow-ups. This surfaces confusing wording, awkward pauses, and technical hiccups before an audience ever sees them. It also relaxes both of you, because the first take no longer carries the weight of being the first time. Skipping this step is one of the fastest ways to undermine the confidence your prompter was meant to create.
Taking the Skills Beyond Interviews
Adapting the workflow for presentations
The habits you build for interviews—short lines, eye-level placement, and a timed rehearsal—transfer almost directly to stage and webinar work. In a presentation, your prompter typically holds section cues, key figures, and transition phrases rather than a full script, which keeps you mobile and responsive to the room. Adjust your scroll speed for a slower, more deliberate speaking pace and give yourself larger text, since you may be reading from a greater distance. Mastering the Teleprompter for Presentations: A Comprehensive Guide walks through those adjustments in depth. If you want to understand the underlying hardware first, start with Understanding Teleprompters for Video Formats: A Complete Guide.
Repurposing the setup for vlogging
Vlogging rewards a lighter touch, because audiences expect conversational energy rather than formal structure. Reuse your equipment by shortening the script to bullet-style prompts and placing the prompter just below your lens for an intimate, direct feel. Practice reading only a few words at a time so you can glance down, speak, and re-engage with the camera in a natural rhythm. The workflow described in The Ultimate Guide to Using a Teleprompter for Vlogging shows how to keep that balance. For quick, repeatable techniques, Practical Ways to Use a Teleprompter for Video Formats offers additional ideas.
Building a repeatable recording routine
The real payoff arrives when your setup becomes a routine you can run without deliberation: script, position, test, warm up, record, review. A documented checklist removes decision fatigue and lets you focus your energy on performance instead of logistics. As your catalog grows, revisit Maximizing Your Teleprompter for Video Formats: Best Practices to refine speed settings, framing, and cue placement. You can also broaden your skills with How to Use a Teleprompter for Various Video Formats Effectively and How to Use a Teleprompter for Interviews: A Complete Guide when you are ready for more advanced scenarios.
Conclusion
A teleprompter for interviews works best when it is treated as part of a routine rather than a one-time fix. Start with a simple setup, write lines you would actually say out loud, rehearse until the scroll feels invisible, and then carry the same structure into presentations and vlogging. With consistent practice, prompts shift from a beginner’s crutch into a professional tool that keeps your delivery sharp, your eye contact steady, and your message clear.
Frequently asked questions
How do I read a teleprompter without sounding like I’m reading?
Write the script in a conversational tone with short sentences, then set the scroll speed slightly slower than your natural speaking pace so you can pause and breathe. Practicing the first two lines out loud until they feel spontaneous helps the most, since a stiff opening sets the pattern for the whole answer. Keeping the text above or beside the lens also lets your eyes stay near the interviewer’s eyeline instead of drifting.
How far should the teleprompter be from my face and what font size should I use?
Place a tablet or glass prompter about an arm’s length (roughly 24–30 inches) from your eyes, with a font large enough to read comfortably at that distance — typically 28–36 pt on a tablet. If you find yourself squinting or leaning forward, the text is too small or the device too far away. Test the setup on camera once, because a prompter that looks fine in the room can make your eye movements obvious on a tight shot.
Should I script my entire interview answers or just use bullet points?
For a beginner, a hybrid works best: write out your opening line and any precise figures, quotes, or calls to action in full, and use short bullet prompts for the middle of each answer. Full scripts cause word-for-word reading that sounds flat and makes you vulnerable if the interviewer asks a follow-up, while pure bullets can leave you searching for words on camera. This keeps you sounding natural while protecting the moments that must be exact.
Can the other person tell I’m using a teleprompter?
Usually not, if the device is mounted close to the camera lens and you avoid moving your head toward it. What gives people away is inconsistent eye contact — reading for one answer and then looking off-camera for the next — so use the prompter for every scripted segment rather than switching styles mid-call. On video interviews the effect is subtle; in an in-person interview, a tablet on the table is far more noticeable than a glass prompter rigged to the camera.
What scroll speed should I set for an interview?
Start around 120–140 words per minute, which is close to a relaxed conversational pace, and adjust after one full read-through. Most teleprompter apps let you fine-tune with a slider or nudge the text forward and backward manually — for interviews, manual or foot-pedal control is safer than auto-scroll, since the interviewer’s questions rarely arrive on schedule. Build in extra blank lines after each answer so you have somewhere to rest while listening.
Is a real teleprompter worth it for a beginner, or is a tablet enough?
A tablet propped just below or beside the camera is enough for casual video interviews and costs nothing extra. The upgrade to a glass beam-splitter prompter becomes worthwhile once you need direct-to-camera eye contact for a professional shoot or client-facing content, because it reflects the script right in front of the lens. Rent one or borrow one first to see whether the eye-contact improvement justifies the price for your use case.
Recording with a script? Try Lumi.
Keep your script near the camera and out of your final video. Try free for 3 days.
Learn more