Live streaming tips are the practical, repeatable habits that help creators plan, run, and improve a broadcast in real time. In this guide we unpack what those tips actually cover, walk through how a live stream works from setup to sign-off, and show how a teleprompter for live events fits into the process so you can engage your audience with teleprompters instead of reading flat notes. The goal is not a longer equipment list — it is a workflow you can run again next week and get a better result.
What Live Streaming Tips Actually Mean
A plain-language definition for new broadcasters
At its simplest, a live streaming tip is any instruction that improves preparation, delivery, or recovery during a broadcast. Preparation covers what you write, test, and schedule before you press the button. Delivery covers how you speak, where you look, and how you pace yourself once you are on air. Recovery covers what you do when a link drops, a line is forgotten, or a comment derails your train of thought. Framed this way, the term stops being a shopping list and becomes a set of habits you can practice.
Why generic advice fails during a live broadcast
General advice such as “be yourself” or “post consistently” is true but almost impossible to act on in the ninety seconds after you go live. Generic tips rarely tell you what to do when your script runs two minutes long, when the first comment is off-topic, or when your audio levels drift mid-sentence. Actionable advice names the moment, the decision, and the fallback — for example, “read your opening line twice at rehearsal speed so your first breath after Go Live is steady.” That specificity is what separates a checklist you actually use from an article you bookmark and forget. It is also why understanding the broadcast flow matters before you collect tips at all.
How tips differ for creators, educators, and speakers
A product creator needs tips about demo timing and call-to-action placement, while an educator needs tips about checkpoints, summaries, and prompts that invite questions. A conference speaker translating stage skills to camera usually needs the most help with eye contact and pacing, because a lectern lets you glance down and a lens does not. The underlying mechanics — audio clarity, structure, interaction, recovery — stay constant across all three, but the emphasis shifts. Recognizing which category you fall into helps you skip advice that does not apply and go deeper on the advice that does. If you are building a broadcast habit from scratch, start with Essential Live Streaming Tips for Engaging Your Audience for the fundamentals.
How a Live Stream Works From Start to Finish
The signal path: camera, encoder, platform
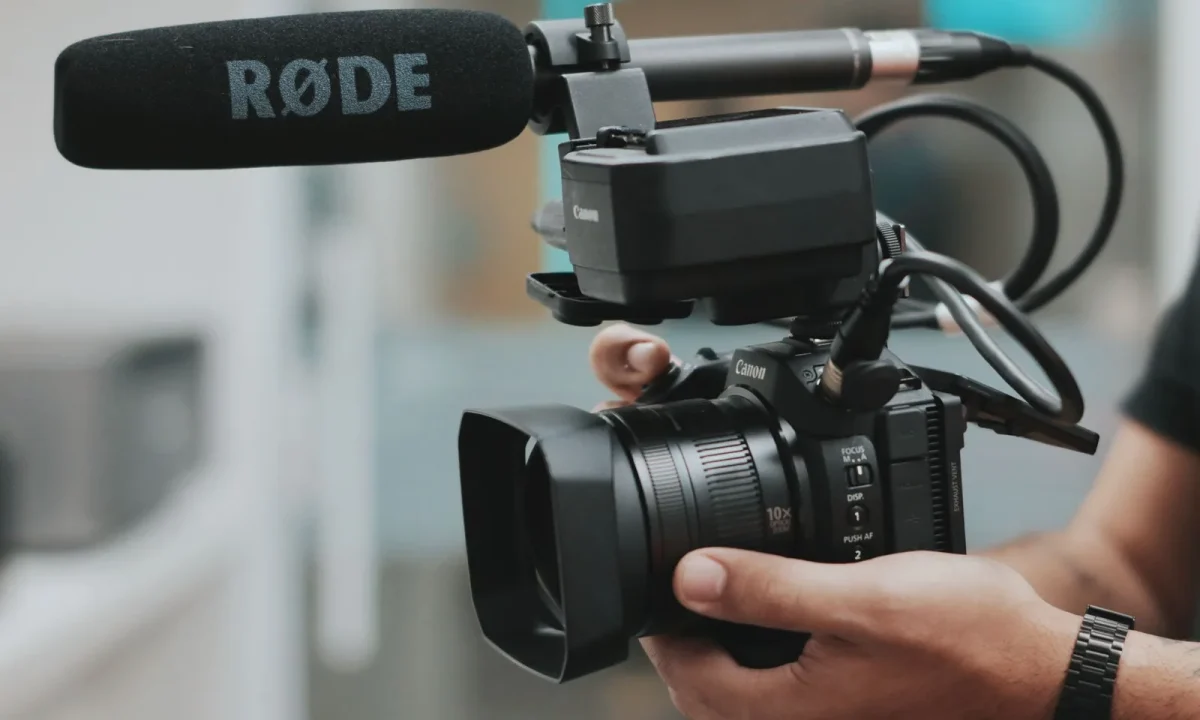
Every live stream follows the same basic signal path. Your camera and microphone feed a computer, phone, or hardware switcher; software on that device encodes the video and audio into a compressed data stream; and that stream is sent over your connection to a platform, which redistributes it to viewers in real time. Understanding this chain explains why so many tips focus on lighting, audio, and bandwidth rather than on camera resolution alone — each stage can introduce delay, distortion, or a complete drop. Public documentation from major platforms publishes the recommended encoding settings for each service, so you do not have to guess at bitrates. When something fails on air, you can ask which link in the chain broke instead of restarting everything.
Setting goals, scene layout, and audio levels
Before any of that runs, you decide what the stream is for and how it should look. A goal might be a launch, a lesson, or a recurring Q&A, and that goal determines your scene layout: an opening title, a main camera angle, a screen-share or demo view, and a closing card. Audio levels are set at this stage too, because a level that is comfortable in a quiet rehearsal often sounds thin once you start speaking with energy. The habit worth building is a short pre-flight sequence — check framing, check mic headroom, check that the correct scene is selected, check the connection — performed in the same order every time. Consistency in this step is what makes everything downstream calmer.
What happens between hitting Go Live and going offline
Once you are live, the stream becomes a series of small, timed decisions: when to greet early arrivals, when to state the agenda, when to move between segments, and when to respond to chat. A rundown keeps those decisions visible so you are not improvising your structure while also performing it. Most broadcasts end poorly not because the middle was weak but because the sign-off was skipped, leaving viewers with an abrupt cut instead of a clear next step. Treating the stream as a defined sequence with a beginning, middle, and end gives you natural places to land your eye line, take a breath, and re-engage. For a deeper technical walkthrough, see Understanding Live Streaming Teleprompters: Functions and Benefits.
Live Streaming Tips to Nail Before You Go Live
Building a rundown with beats and timing
A rundown is a one-page map of your broadcast divided into beats — short segments with a purpose and an approximate duration. Writing beats rather than paragraphs forces you to decide what must happen in each block, and it gives you a recovery point if you run long or short. A simple rundown might read: hook (0:00–0:45), context, demo, questions, wrap. Timing estimates only need to be rough; their value comes from making drift visible while you still have time to adjust. Keep the rundown within arm’s reach of your prompter so you can glance at headings without breaking eye contact for long.
Writing a script that sounds spoken, not recited
Written language and spoken language are different instruments, and a script drafted like an essay will sound stiff the moment you read it aloud. Short sentences, contractions, and natural transitions survive the trip from page to mouth, while dense clauses and long parentheticals do not. Read every line out loud during drafting and cut anything you stumble over, because you will stumble on it again on air. Add breathing marks, emphasis notes, and short cue words that signal a shift in tone or segment. If you want a full framework, Mastering Teleprompter Usage walks through drafting, formatting, and rehearsing for on-camera delivery.
Testing gear, lighting, and internet the day before
Testing the day before — not the hour before — turns surprises into fixes. Record a short clip to check audio levels, lighting balance, and framing, then watch it back with headphones because problems you cannot hear in the room are obvious on playback. Run a speed test on the same connection and the same time of day you plan to stream, since networks fluctuate. Confirm that software updates, browser permissions, and platform logins are already handled so nothing triggers a restart mid-session. This is also the moment to assemble your backup: a mobile hotspot, a spare cable, or a pre-loaded holding slide.
Why a teleprompter for live events belongs in your prep
A teleprompter for live events earns its place during preparation, not during the broadcast itself. It gives you a verified opening, a guaranteed set of key points, and a reliable close, which means your on-air energy goes into delivery rather than recall. Setting it up the day before lets you practice scroll speed, mirror settings, and camera placement under no pressure. Treat it as a rehearsal tool as much as a live one: the run-through reveals lines that are too long and transitions that need a cue word. For hardware and layout guidance, see Step by Step: Your Live Streaming Teleprompter Setup.
Engaging Audience With Teleprompters While Live
Setting scroll speed to match your natural cadence
Scroll speed is the single most common reason a prompter feels like an adversary instead of a helper. If the text moves faster than you speak, you rush and your breathing collapses; if it moves slower, you stall and the pauses feel awkward. Set the speed during rehearsal at a pace where each line arrives just as you finish the previous one, and keep it consistent across segments. Small adjustments are fine mid-stream, but resist the urge to chase the text — you control the speed, not the other way around.
Looking at the lens instead of the moving text
Audiences read eye contact as attention, so a presenter who watches scrolling words feels disengaged even when the content is excellent. The fix is a combination of hardware placement and habit: mount the prompter as close to the lens as your setup allows, then train yourself to hold the lens between phrases rather than tracking every word. Short lines help enormously, because you can absorb a full line with a quick glance and return your focus forward. Practice by reading aloud from a teleprompter while a friend watches your eyes and tells you exactly when they drift.
Adding cue words and reminders in your script
Cue words are short, bracketed instructions embedded in the script — [pause], [demo], [ask chat], [smile] — that tell your future self what to do at a specific moment. They function like stage directions, turning a flat block of text into an interactive plan. Cues are especially valuable when they remind you to look up, shift posture, or address viewers directly, since those actions are the first things abandoned under pressure. For a fuller treatment of script markup, Engaging Your Audience with Teleprompters: A Complete Guide shows how to structure prompts around interaction rather than recitation.
Recovering smoothly when you lose your place
Losing your place is normal, and the audience only notices if you react as though something has gone wrong. Take a breath, glance at your rundown heading, and use a bridge line you have pre-written for exactly this case — something like “let me back up a step so that lands properly.” A two-second pause reads as deliberate emphasis far more often than it reads as confusion. The recovery habit should be rehearsed like any other segment, so that it feels routine rather than improvised under stress. More guidance lives in Practical Tips for Using a Live Streaming Teleprompter Effectively.
Live Streaming Tips for Holding Attention in Real Time
Opening hooks for the first thirty seconds
Viewers decide very quickly whether to stay, so your opening needs to state a reason to keep watching before it states who you are. Lead with the payoff — what someone will know, see, or be able to do — and delay background details until the hook has done its work. A concrete promise is stronger than a welcome: “by the end of this you’ll have a rundown you can reuse” beats “hi everyone, thanks for joining.” Deliver it at a slightly higher energy than feels natural on camera, since the lens tends to flatten expression.
Reading comments without breaking your flow
Chat is where live streams earn their advantage over recorded video, but reacting to it badly will scatter your structure. Decide in advance which moments are open for interaction — after a segment ends, or during a designated Q&A block — so questions do not interrupt explanations mid-thought. Read the comment out loud or paraphrase it before answering, so viewers joining late can follow along. Keep a short list of names to thank; recognition costs a second and builds genuine loyalty.
Segmenting the stream into clear chapters
Clear chapters give returning viewers an easy place to rejoin and give new arrivals a reason to stay through the next transition. Announce segments verbally and, where the platform supports it, mark them in the description or timeline so replays become navigable. Each chapter should open with a one-line restatement of what is about to happen, which also buys you a natural moment to check your prompter. This structure is what makes retention curves steadier than a single unbroken monologue. For broader strategy, Effective Live Streaming Teleprompter Tips for Engaging Audiences expands on pacing and chapter design.
Common Live Streaming Mistakes and Easy Fixes
Scripting like a webinar instead of a conversation
The most frequent error is writing in complete, formal sentences and then delivering them word for word, which produces the flat tone people associate with corporate updates. The fix is to script in fragments: key phrases, transitions, and numbers, with the connective tissue left to be spoken naturally. When you know the destination, you can take a conversational route and still arrive on time. This single change does more for perceived warmth than any camera upgrade.
Ignoring audio quality in favor of visuals
Viewers will tolerate imperfect lighting far longer than they will tolerate muddy or clipping audio, yet audio often receives the least attention during setup. Test with the mic you will actually use, at the distance you will actually sit, and check for room echo, fan noise, and plosives. A cheap lavalier or a treated corner of a room typically outperforms an expensive camera paired with a weak built-in microphone. If you want a checklist of what to catch before going live, Avoiding Common Mistakes with Your Live Streaming Teleprompter covers the most common pitfalls in detail.
Skipping the warm-up and the wrap-up
Without a warm-up, your first minute becomes the rehearsal — voice tight, hands cold, energy climbing while viewers arrive. Without a wrap-up, streams end on an accidental cut, and viewers never learn what to do next. A two-minute warm-up of reading your opening aloud at performance volume, plus a thirty-second close with a clear call to action, brackets the broadcast professionally. Both are free, both take less than five minutes, and both are skipped constantly.
Tools That Support Smoother Live Streaming Tips
Teleprompter apps built for streaming setups
Purpose-built prompter apps let you control scroll speed with a remote or foot pedal, mirror text for glass rigs, and load scripts from the same device that runs your stream. Look for adjustable font sizes, line spacing, and a wide margin so your eyes do not have to travel far between lines. Remote control matters more than it sounds: reaching for a keyboard on camera breaks the illusion instantly. Test your app with the exact browser or encoder you plan to use, since scrolling behavior can vary between them.
Lighting and audio basics on a modest budget
You do not need a studio to get usable production quality. One soft key light placed slightly above and to the side of the camera, plus a plain wall or a lamp for separation, eliminates most shadows and gives your face dimension. For audio, prioritizing a directional microphone close to your mouth solves more problems than any post-processing chain. A modest setup executed consistently will beat an expensive setup used haphazardly.
Backup plans when software or network misbehaves
Every reliable broadcaster carries a contingency, because software updates, platform outages, and unstable networks are routine rather than exceptional. Keep a secondary connection — a phone hotspot is usually enough — plus a spare cable and a holding slide or offline message ready to deploy. Decide in advance what condition triggers the switch so you are not making judgment calls while anxious. If the stream does drop, tell viewers where you will continue and when; transparency preserves more goodwill than a silent restart.
Measuring Success After the Stream Ends
Metrics worth reviewing beyond viewer count
Peak concurrent viewers is the number most people quote, but it says little about whether the broadcast worked. Retention curves show where attention sagged, chat activity shows which moments provoked response, and replay views reveal whether the content had value after the fact. Average watch time and click-throughs on any call to action add context that a single headline number cannot. Review these together rather than in isolation, and consult your platform’s public documentation for how each metric is defined before drawing conclusions.
Turning replay data into your next set of tips
The purpose of measurement is to produce a specific instruction for next time: shorten the second segment, open the demo earlier, or slow the prompter during the technical section. Watch your own replay with a notebook and mark every point where you hesitated, repeated yourself, or lost the thread — those markers become entries on your checklist. Over three or four broadcasts, patterns emerge that no generic guide could have told you about your particular audience. This is where personal live streaming tips begin to replace borrowed ones.
Conclusion
Live streaming tips work best when they are tied to a clear understanding of how the broadcast itself runs. Prepare a spoken-sounding script, use a teleprompter for live events to stay in control of pace and eye contact, engage your audience with teleprompters and direct interaction, and review what happened after the stream. The technical chain behind you — camera, encoder, platform — only becomes intuitive once you have walked through it a few times with a rundown in hand.
Start with one tip from each section, apply it to your next broadcast, and build your own repeatable checklist over time. If you want a structured starting point, Best Practices for Using a Live Streaming Teleprompter Effectively and Live Streaming Teleprompter: Everything You Need to Know cover the essentials in sequence, so you can adopt habits gradually instead of overhauling everything at once.
Frequently asked questions
What internet speed do I need for live streaming without lag?
For a stable 1080p stream, aim for upload speeds of at least 6 Mbps, and use 10-12 Mbps to leave headroom for other devices on the network. A wired Ethernet connection is far more reliable than Wi-Fi, and you should cap your bitrate at about 70-80% of your actual upload speed to avoid dropped frames.
What equipment do I need to start live streaming?
At minimum, you need a computer or phone, a decent microphone, and stable internet. A webcam and basic lighting (even a desk lamp placed in front of you) improve quality more than most upgrades, while an external mic or headset is usually the single best audio investment before buying a better camera.
Should I use OBS or Streamlabs as a streaming beginner?
OBS Studio is free, lightweight, and gives you more control as you grow, while Streamlabs adds built-in overlays, alerts, and themes that simplify setup for beginners. If you want to learn the fundamentals and keep system resources free, start with OBS Studio.
Why does my stream keep buffering or dropping frames?
Dropped frames are usually caused by upload bandwidth limits or network instability, not by your camera or CPU. Lower your bitrate, switch to Ethernet, and close background apps that upload or sync data; if the problem persists, contact your ISP about connection consistency rather than raw speed.
How do I choose the right platform to live stream on?
Pick the platform where your audience already spends time: Twitch for gaming and community-building, YouTube Live for discoverability and long-term video value, and TikTok or Instagram for short, mobile-first content. Consider monetization thresholds and moderation tools as secondary factors once audience fit is clear.
What bitrate and resolution settings should beginners use?
Start with 720p at 30 frames per second and a bitrate around 3,500-4,500 kbps, which most platforms handle comfortably and most internet connections can sustain. Move to 1080p or 60 fps only once your upload speed is consistently double your bitrate and you have no dropped frames at the lower setting.
Recording with a script? Try Lumi.
Keep your script near the camera and out of your final video. Try free for 3 days.
Learn more