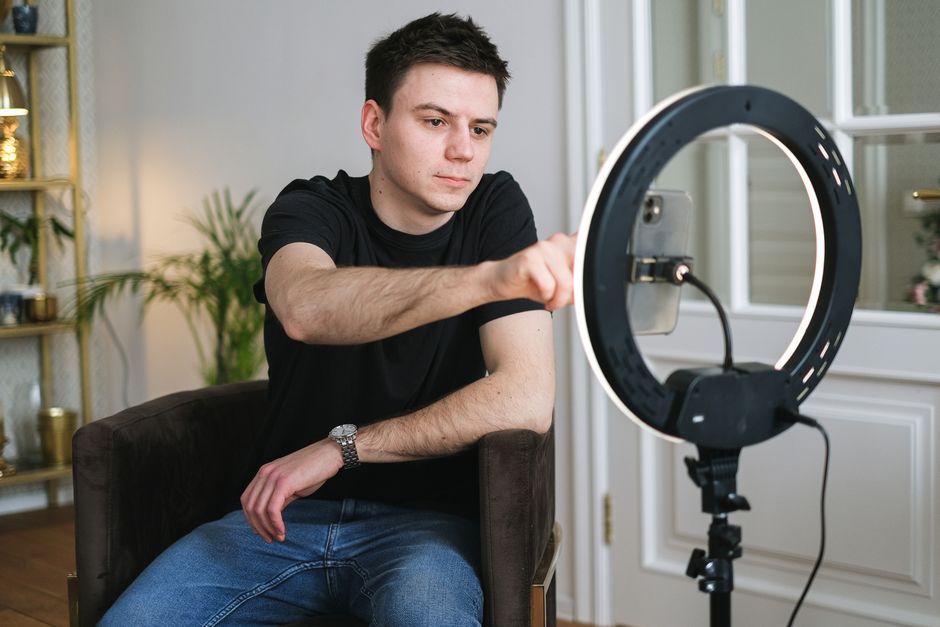
If you’ve ever watched a polished YouTube video or a professional broadcast and wondered how the speaker maintains such confident, unbroken eye contact, the answer is often a teleprompter. These tips for using a teleprompter will transform your video delivery from hesitant to confident, but getting the most out of the tool requires more than just reading off a screen. Whether you’re a beginner setting up your first device or a seasoned creator looking to refine your technique, the practical advice in this guide will help you master the art of teleprompter use. We’ll cover everything from initial setup and script preparation to advanced delivery strategies, ensuring your on-camera presence is polished and professional every time you hit record.
Mastering the Basics: Your Teleprompter Setup for Beginners
Before you can deliver a compelling performance, you need a solid foundation. Teleprompter setup for beginners can feel overwhelming with all the gear and software options available, but the core principles are straightforward. Getting the physical setup right ensures that your reading experience is comfortable and natural, which directly translates to a better on-camera performance. Let’s break down the three most critical elements of a beginner-friendly teleprompter setup.
Choosing the Right Position and Distance
The position of your teleprompter relative to the camera lens is arguably the most important physical decision you’ll make. The ideal placement puts the prompter screen as close to the lens as possible so that your eyes appear to be looking directly at the viewer when you’re reading. If the prompter is mounted too far above, below, or to the side of the lens, your eye line will drift and the illusion of direct eye contact breaks down. For most desktop setups, a beam-splitter teleprompter mounted directly in front of the lens is the gold standard, but even tablet-based setups can work well if you position the device directly behind or just above the lens. As for distance, aim to place the screen roughly 24 to 36 inches from your face — close enough to read comfortably without squinting, but far enough to maintain a natural gaze. Experiment with small adjustments until you find the sweet spot where reading feels effortless and your eyes naturally align with the camera.
Adjusting Font Size and Scroll Speed for Comfort
Font size and scroll speed are the two variables that most directly affect your reading comfort, and getting them wrong is one of the fastest ways to sabotage your performance. If the font is too small, you’ll squint and strain, which shows on camera. If it’s too large, you’ll be scrolling through the script too frequently, which can disrupt your flow. A good rule of thumb is to use a bold, sans-serif font at a size that allows you to read three to four words at a glance without moving your head. Most teleprompter applications let you customize these settings, and tools like the Lumi Notch Teleprompter for Windows & Mac offer intuitive controls for adjusting font size, color, and scroll speed to match your personal reading pace. Start by reading your script aloud at a natural pace and note the timing, then set your scroll speed to match. It’s always better to start slightly slower and fine-tune from there rather than racing through the text.
Lighting Considerations to Avoid Glare
Lighting is a factor that many first-time teleprompter users overlook, but it can make or break the readability of your screen. Glare on the teleprompter glass or reflective surface can wash out the text and force you to strain your eyes, which undermines the entire purpose of the device. Position your key light sources so they don’t shine directly onto the prompter screen or create reflections on the glass. Soft, diffused lighting — such as that produced by LED panels with diffusion filters — tends to work best because it illuminates your face evenly without creating harsh hotspots. If you’re using a tablet-based teleprompter, a hood or shade attachment can be incredibly helpful for blocking ambient light and improving screen contrast, especially in rooms with overhead fluorescent lighting or large windows.
Script Preparation: The Foundation of a Smooth Reading
Even the most expensive teleprompter in the world can’t save a poorly written script. The way you prepare your text before it ever appears on screen has an enormous impact on how natural and engaging your delivery sounds. Thoughtful script preparation is one of the most underrated tips for using a teleprompter effectively, and it’s where the real work happens behind the scenes.
Writing for the Ear: Short Sentences and Clear Language
When you write for a teleprompter, you’re not writing an essay or a blog post — you’re writing something that will be spoken aloud and consumed by ear. This means short sentences, simple vocabulary, and a conversational tone are your best friends. Long, complex sentences with multiple clauses are difficult to read in real time and even harder for your audience to follow. Aim for sentences that are no longer than 15 to 20 words whenever possible. Replace jargon and technical language with plain, accessible alternatives unless you’re addressing a specialist audience. Read every sentence aloud as you write it; if you stumble or run out of breath, the sentence is too long and needs to be broken up. This practice alone will dramatically improve the flow of your teleprompter delivery.
Using Cue Words and Strategic Line Breaks
Cue words and line breaks are the secret weapons of experienced teleprompter users. Cue words — phrases like “remember,” “important,” or “for example” — signal to your brain that a shift in tone or emphasis is coming, helping you modulate your delivery naturally rather than reading in a monotone. Strategic line breaks serve a similar purpose: they create visual pauses in the text that encourage you to take a breath and pace yourself. Instead of writing a wall of text, insert a blank line between paragraphs and even between key sentences within a paragraph. This gives your eyes a momentary rest and prevents the dreaded “reading ahead” problem where your brain tries to process the next line before you’ve finished speaking the current one. When combined with highlighting or color-coding for emphasis, these techniques turn a flat script into a dynamic roadmap for your performance.
The Importance of a Proper Teleprompter Format
Formatting your script specifically for teleprompter use is a step that separates amateurs from professionals. Standard document formatting — with justified text, narrow margins, and small fonts — is designed for print, not for scrolling on a screen while someone speaks. Instead, center-align your text, use a large bold font, and keep your lines short (typically no more than 8 to 10 words per line). Avoid all-caps for entire passages, as they can be harder to read quickly, though selective use of caps for emphasis can be effective. Number your paragraphs or sections so you can quickly find your place if you need to stop and restart. Many teleprompter applications, including dedicated software solutions, offer built-in formatting templates that handle much of this for you, but understanding the principles ensures you can adapt to any tool or situation.
Delivery Techniques to Sound Natural and Engaging
With your setup dialed in and your script polished, it’s time to focus on what happens when the camera starts rolling. Delivery is where the magic happens — or where it falls flat. The best teleprompter users make the technology invisible, and achieving that effect requires deliberate practice in several key areas.
Eye Contact: Looking at the Lens, Not the Screen
This is the single most important delivery technique for teleprompter users, and it bears repeating: look at the camera lens, not at the text on the screen. The entire purpose of a teleprompter is to place the script as close to the lens as possible so that your gaze appears direct and personal to the viewer. If you find yourself drifting your eyes downward or to the side to read the text, your prompter positioning needs adjustment, or you need to practice keeping your gaze centered. One helpful exercise is to record a short test clip and watch it back specifically for eye contact. You’ll quickly notice if your gaze is wandering, and you can make corrections before you begin your actual recording. Over time, this becomes second nature, but it requires conscious effort in the beginning.
Pacing, Pausing, and Vocal Variety
A monotone delivery is the hallmark of someone who is reading rather than communicating, and teleprompters can exacerbate this tendency if you’re not mindful. To sound natural, vary your vocal pitch, speed, and volume throughout your script. Emphasize key words, slow down for important points, and speed up slightly during less critical transitions. Strategic pauses are especially powerful — a well-placed pause after a key statement gives your audience time to absorb the information and adds a sense of authority to your delivery. If your script includes natural pause points (and it should, thanks to those strategic line breaks we discussed), use them deliberately. Don’t be afraid of silence; it’s far more engaging than rushing through a script without taking a breath.
Using Hand Gestures and Body Language
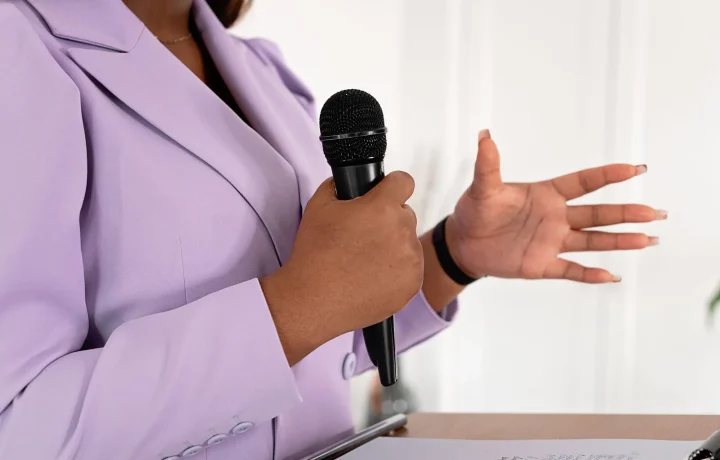
One common pitfall of teleprompter use is that speakers become so focused on reading that they forget about their body language, resulting in a stiff, static performance. Your hands, posture, and facial expressions are powerful communication tools that should complement your words, not disappear. Practice incorporating natural hand gestures that align with your content — pointing for emphasis, using open palms to convey inclusivity, or counting on your fingers when listing items. Keep your posture open and relaxed, leaning slightly toward the camera to create a sense of engagement. If you’re unsure where to gesture, record yourself delivering the script without a teleprompter first to see what movements come naturally, then work to replicate those gestures while reading.
For a deeper dive into these foundational skills, check out our comprehensive guide on Video Recording Techniques, which covers camera positioning, audio setup, and on-camera presence in greater detail.
Advanced Tips for Professional-Quality Results
Once you’ve mastered the fundamentals, a few advanced techniques can take your teleprompter work from good to genuinely professional. These strategies are particularly valuable for creators who produce content regularly and want to optimize both quality and efficiency.
Customizing Highlighting and Markers
Most professional teleprompter software allows you to highlight specific words or phrases in different colors, and this feature is far more useful than it might seem at first glance. Use highlighting to mark words that need emphasis, sections where you should slow down, or moments where you’ll incorporate a gesture. Some creators use one color for emphasis, another for pauses, and a third for tonal shifts. This visual coding system turns your script into a rich set of performance instructions that your brain can process at a glance. If your software supports it, you can also insert marker notes — brief reminders like “smile here” or “lean forward” — that appear alongside the scrolling text without disrupting the reading flow.
Using a Remote Control or Foot Pedal Effectively
Controlling the scroll speed of your teleprompter without breaking character or reaching for a keyboard is a game-changer for solo creators. A wireless remote control allows you to pause, rewind, or adjust speed discreetly, while a foot pedal offers hands-free control that keeps both your hands free for gestures and your focus on the camera. The key to using these tools effectively is practice — you need to develop the muscle memory to operate the control without looking down or hesitating. Start by practicing with your script’s scroll speed set slightly slower than you need, and use the remote to nudge it forward as you gain confidence. This approach gives you a safety net while you build comfort with the controls.
Multi-Camera Setups and Teleprompter Placement
When working with multiple cameras, teleprompter placement becomes more complex because you need to maintain eye contact with the primary camera while potentially switching between angles. The most common approach is to mount the teleprompter on your main or “A” camera — the one you’ll be looking at for the majority of your delivery. During B-roll or cutaway shots, you can relax your gaze since the viewer won’t see your eyes. If you need to address a secondary camera, consider using a second, smaller prompter or a confidence monitor positioned near the secondary lens. Planning your shot list in advance and marking which camera you should address at each point in the script will help you transition smoothly between angles without losing your place or your composure.
Common Mistakes to Avoid When Using a Teleprompter
Even experienced users fall into habits that undermine their teleprompter performance. Being aware of the most common mistakes can help you course-correct before they become ingrained patterns.
Reading Verbatim Without Internalizing the Script
The biggest mistake teleprompter users make is treating the script as a crutch rather than a guide. When you read word-for-word without understanding the material, your delivery sounds mechanical and disconnected. The solution is to internalize your script before you ever step in front of the camera. Read it through several times, understand the key points and the logical flow, and even try summarizing the content in your own words. When you record, use the teleprompter as a reference to keep you on track rather than a strict script to follow verbatim. This subtle shift in mindset produces a dramatically more natural and engaging performance.
Setting the Scroll Speed Too Fast or Too Slow
Incorrect scroll speed is one of the most frequent technical issues users encounter. If the text scrolls too fast, you’ll rush through your lines, stumbling over words and losing your natural rhythm. If it scrolls too slow, you’ll find yourself waiting awkwardly for the next line, which creates unnatural pauses and breaks your momentum. The ideal speed matches your natural speaking pace exactly, which is why timing yourself during a practice read-through is so valuable. Most teleprompter apps allow you to set speed in words per minute, giving you precise control. Start conservative, record a test, and adjust incrementally until the scroll feels invisible — that’s when you know you’ve found the right speed.
Neglecting to Practice Before Recording
Practice is the bridge between knowing what to do and actually doing it on camera. Skipping practice runs is tempting, especially when you’re pressed for time, but it almost always leads to a weaker performance. At minimum, do one full read-through with the teleprompter before you start recording. This allows you to catch formatting issues, identify sections where the language feels awkward, and get comfortable with the scroll speed. If time permits, do two or three practice runs, each one focusing on a different element — one for eye contact, one for pacing, and one for gestures. This layered approach to practice builds competence across multiple dimensions simultaneously.
For more guidance on structuring your practice sessions and refining your on-camera skills, our article on How to Use a Teleprompter: A Practical Guide for Beginners provides a step-by-step framework that complements the tips covered here.
Optimizing Your Workflow for Different Types of Content
Not all video content is created equal, and the way you use your teleprompter should adapt to the specific demands of each format. A strategy that works beautifully for a pre-recorded tutorial may not translate well to a live stream or a quick social media clip.
Tips for Live Streaming and Real-Time Presentations
Live streaming introduces an element of unpredictability that pre-recorded content doesn’t have, and your teleprompter workflow needs to account for this. Unlike a recorded video where you can stop and restart, a live broadcast requires you to maintain composure even when things go off-script. For live streams, keep your teleprompter text concise — bullet points and key phrases work better than full paragraphs because they give you room to improvise and interact with your audience. Set your scroll speed to match a slightly more relaxed pace than your usual recording speed, since live interaction often involves pauses for reading comments or responding to questions. Some streamers use a dual-screen setup with the teleprompter on one monitor and the stream dashboard on another, allowing them to toggle between scripted content and audience engagement seamlessly.
Adapting for Educational or Instructional Videos
Educational content demands clarity above all else, and your teleprompter script should reflect this priority. When scripting instructional videos, break your content into clearly defined segments with explicit transitions between topics. Use cue words like “next,” “now let’s,” and “moving on” to signal these transitions both to yourself and to your audience. Consider incorporating on-screen graphics or demonstrations during pauses in your teleprompter text, which gives you natural break points and keeps the visual experience dynamic. The pacing for educational content tends to be slightly slower than other formats because you need to give viewers time to absorb complex information, so adjust your scroll speed accordingly and don’t be afraid of deliberate pauses after key concepts.
Quick Tips for Marketing and Social Media Clips
Short-form content for platforms like Instagram Reels, TikTok, and YouTube Shorts requires a different teleprompter approach entirely. These clips need to hook viewers in the first two to three seconds, so your opening line should be compelling and delivered with energy. Keep your scripts extremely short — 30 to 60 seconds of spoken text at most — and focus on a single clear message or call to action. The scroll speed for short clips should be slightly faster than your normal pace to match the quick-cut editing style typical of social media. Because these videos are so short, many creators find it easier to memorize the script entirely and use the teleprompter only as a confidence backup rather than a primary reading tool.
Hardware and Software Considerations for a Better Experience
The tools you choose have a significant impact on your teleprompter experience, and understanding the trade-offs between different options helps you invest wisely in equipment that matches your needs and budget.
When to Use a Dedicated Prompter vs. a Tablet App
Dedicated teleprompter hardware — such as beam-splitter units that mount directly onto your camera lens — offers the most seamless experience because the text appears directly in your line of sight while you look at the lens. These devices are ideal for professional studios, broadcast environments, and creators who produce high volumes of video content. Tablet-based teleprompter apps, on the other hand, offer remarkable flexibility and affordability. For many content creators, a well-configured tablet app mounted in the right position produces results that are nearly indistinguishable from dedicated hardware, especially for talking-head videos and tutorials. The deciding factor often comes down to your production volume and quality requirements. If you’re producing daily content and need maximum efficiency, a dedicated unit may justify its higher cost. If you’re creating weekly videos or just getting started, a quality tablet app is an excellent entry point.
Essential Accessories: Mounts, Hoods, and Software Features
Regardless of whether you choose dedicated hardware or a tablet app, a few key accessories can significantly improve your experience. A sturdy, adjustable mount ensures your teleprompter stays securely positioned at the right angle throughout your recording session, preventing the frustrating drift that cheap mounts often cause. A teleprompter hood or shade is essential for tablet users, as it blocks ambient light and reduces glare on the screen, making the text far easier to read. On the software side, look for features like adjustable scroll speed, font customization, script importing from common document formats, and the ability to mirror text (which is necessary for beam-splitter setups). Some advanced applications also offer Bluetooth remote compatibility, script libraries, and real-time editing, which can streamline your workflow considerably.
Conclusion
Effectively using a teleprompter is a skill that blends technical setup with personal delivery, and mastering it opens up a new level of professionalism in your video content. By implementing these tips — from careful script preparation and proper physical setup to mastering natural eye contact, pacing, and body language — you can significantly enhance the quality and polish of every video you produce. Remember that the goal of a teleprompter is to support your message, not replace your authenticity; the best teleprompter users are the ones who make the technology invisible so the viewer focuses entirely on the content. Start with the fundamentals covered in this guide, practice consistently, and gradually incorporate the advanced techniques as your comfort level grows. With patience and deliberate effort, you’ll soon be delivering your lines with the confidence and clarity of a seasoned professional.
Frequently asked questions
How do I adjust the teleprompter text speed to match my natural speaking pace?
Start by reading the script aloud at your normal pace, then set the teleprompter speed slightly slower than that rate. Most apps allow you to fine-tune the scroll speed in increments, so practice adjusting it in real-time until the words feel like they’re following you, not the other way around. The goal is a speed that lets you breathe naturally and add emphasis without rushing.
What’s the best way to avoid sounding robotic or reading word-for-word?
Write your script in a conversational tone, using contractions and short sentences. Break the text into thought chunks rather than full paragraphs, and mark places to pause or look away for emphasis. Practice the script until it feels familiar, then use the teleprompter as a guide for key points, not a rigid dictation. Vary your pitch and speed intentionally to sound more natural.
Where should I position the teleprompter camera lens so it looks like I’m making eye contact?
Place the teleprompter screen directly in front of or as close as possible to the camera lens, ideally with the text displayed just below or around the lens itself. This minimizes the angle your eyes need to move to read, creating the illusion of direct eye contact with the viewer. Avoid placing the screen off to the side, as it will make your gaze appear averted.
How can I reduce eye movement and avoid looking like I’m reading?
Use a large, clear font and increase the text size so you can read without moving your eyes side-to-side. Keep the scrolling text centered on your screen and practice with a soft focus, taking in a few words at a time rather than tracking each character. Periodically glance away at a fixed point to break the reading pattern, especially during pauses.
What font size and style work best for teleprompter readability?
A sans-serif font like Arial or Helvetica in a 56-72 point size is generally easiest to read quickly. Ensure high contrast—typically white or yellow text on a dark background—to reduce eye strain. Test your chosen settings in the actual recording environment, as lighting and screen brightness can affect readability.
How do I handle mistakes or stumbling while using a teleprompter?
Pause, take a breath, and resume from the beginning of the sentence or a natural break point. Don’t try to correct mid-sentence, as it can sound disjointed. If using a remote operator, agree on a signal to pause or rewind slightly. Most importantly, practice enough beforehand so the script feels second nature, reducing the chance of stumbling in the first place.
Recording with a script? Try Lumi.
Keep your script near the camera and out of your final video. Try free for 3 days.
Learn more