Mastering lighting is crucial for creating high-quality video content. This guide provides practical lighting tips for video that every content creator should know.
Understanding the Importance of Lighting in Video
Lighting plays a pivotal role in video production, influencing both the aesthetic appeal and the emotional impact of the content. Proper lighting can make a scene feel inviting and professional, while poor lighting can lead to a lackluster viewing experience. Understanding how to manipulate lighting effectively allows creators to tell their stories in the most engaging way possible.
How Lighting Affects Video Quality
The quality of lighting directly affects various aspects of video production, such as color accuracy, clarity, and viewer engagement. When lighting is executed well, it enhances the colors in the scene, making them more vibrant and accurate. Conversely, inadequate or excessive lighting can wash out colors or create unwanted shadows, detracting from the overall visual experience. This is why mastering lighting is essential for video production success.
Types of Lighting for Video Production
There are several types of lighting that can be utilized in video production. Key types include ambient lighting, which provides overall illumination; key lighting, which is the primary light source; and fill lighting, which helps reduce shadows created by the key light. Each type serves a distinct purpose and can be combined creatively to produce the desired effect in your videos. Understanding these types allows for more versatile lighting setups tailored to specific scenes or moods.
Essential Lighting Tips for Video Setup
Creating a well-lit video setup requires a thoughtful approach to the types of light used and how they are arranged. Here are some essential tips to ensure your lighting setup enhances your video quality.
Natural Light vs. Artificial Light
Natural light can be a fantastic resource for video production, particularly during the golden hour when the lighting is soft and warm. However, relying solely on natural light can be unpredictable. Therefore, incorporating artificial light sources, such as LED panels or softboxes, can help you maintain consistent lighting conditions. A combination of both can yield the best results, allowing for flexibility depending on the shooting environment.
Three-Point Lighting Technique
The three-point lighting technique is a classic approach that involves using three distinct light sources: the key light, fill light, and backlight. The key light is the main source, positioned to one side of the subject to create depth. The fill light softens shadows created by the key light and is typically positioned on the opposite side. The backlight adds dimension by illuminating the subject from behind, helping them stand out from the background. Implementing this technique can significantly enhance the overall look of your videos.
Using Softbox Lights Effectively
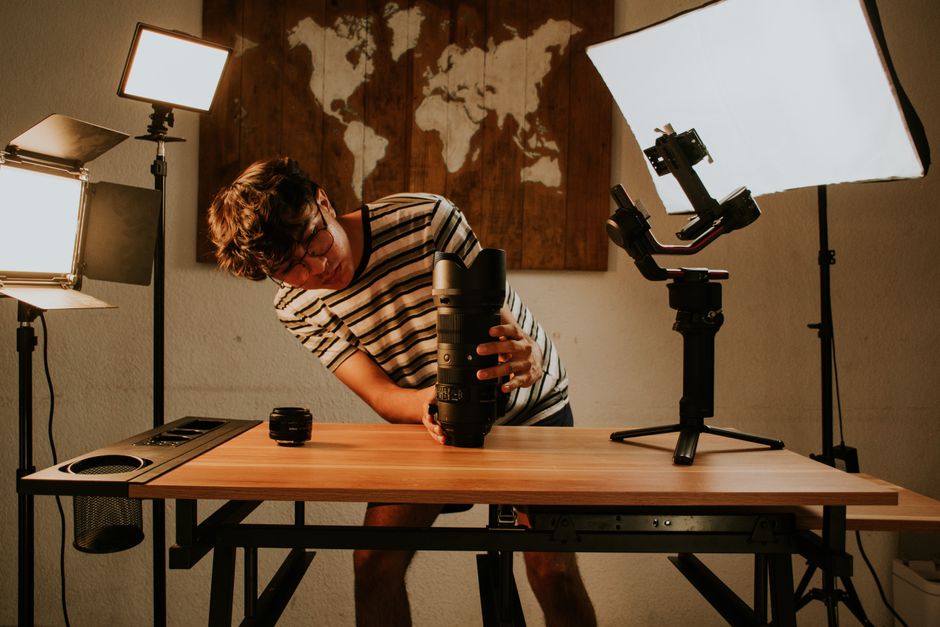
Softbox lights are excellent for diffusing harsh lighting and creating a soft, even glow. When using softboxes, position them at a 45-degree angle to your subject to effectively reduce shadows while providing a flattering light. Additionally, adjusting the distance of the softbox from the subject can help control the intensity of the light, ensuring that it complements the overall scene rather than overwhelming it.
Common Mistakes to Avoid with Lighting
Even seasoned videographers can fall prey to common lighting pitfalls. Being aware of these mistakes can help you create better quality videos.
Overexposure and Underexposure Issues
One of the most frequent mistakes in video lighting is overexposure or underexposure. Overexposure can lead to loss of detail in bright areas, while underexposure can make your video too dark and hard to see. To avoid these issues, use a light meter or the camera’s histogram to monitor exposure levels accurately. Adjusting your lighting setup and camera settings accordingly will help ensure a balanced exposure.
Neglecting Shadows and Contrast
Shadows can add depth and dimension to your videos, but if neglected, they can also create distracting and unflattering results. When setting up your lights, consider how shadows will fall and ensure they enhance, rather than detract from, your subject. Using fill lights can help soften harsh shadows, maintaining a natural look while still providing the contrast necessary for visual interest.
Ignoring Background Lighting
Background lighting is often overlooked, yet it can significantly impact the overall scene. Properly lighting the background can help separate the subject from the backdrop, adding depth to the composition. Consider using practical lights, such as lamps or LED strips, to create an inviting atmosphere that complements your primary subject.
Lighting Tips for Different Video Styles
Different video styles require unique lighting approaches. Here are tailored tips for various types of video content.
Lighting for Interviews and Talking Heads
When filming interviews or talking heads, the goal is to create a flattering and engaging look. Utilize the three-point lighting technique, ensuring that the key light is at eye level for the subject. This creates a natural and relatable feel. Additionally, consider using a slight backlight to help separate the subject from the background and add depth to the shot.
Creative Lighting for Vlogs
Vlogs often thrive on authenticity and creativity. Experiment with different lighting setups to reflect your personality and style. Using colored gels or creative light sources can add an interesting flair to your vlogs, making them visually striking and unique. Remember to adapt to the environment you’re in, whether it’s indoors or outdoors, to maintain continuity in your lighting.
Dramatic Lighting for Narrative Videos
Dramatic lighting can heighten the emotional impact of narrative videos. Utilize low-key lighting techniques to create shadows that evoke tension and suspense. Directional lighting can also be used to highlight key elements within the scene, guiding the viewer’s eye and enhancing storytelling. Remember, the choice of lighting can significantly affect the mood you aim to create.
Incorporating Audio Tips for Video Recording
While lighting is essential for video quality, it’s equally important to consider how it interacts with audio quality. Here are some insights on merging both elements effectively.
How Lighting Impacts Sound Quality
Surprisingly, lighting can have an indirect impact on sound quality. In environments with harsh lighting, reflections and echoes can occur, leading to unintended audio distortions. Ensuring a soft and balanced lighting setup can help minimize these issues, creating a better overall audio experience. This is especially important when recording dialogue or interviews.
Best Practices for Synchronizing Audio and Video
To achieve seamless synchronization of audio and video, it’s essential to establish clear markers during recording. Using visual cues, such as a clapboard, can effectively help align audio with video during editing. Furthermore, ensure that your lighting setup remains consistent throughout the shoot to avoid fluctuations in color temperature that could complicate post-production synchronization.
Tools and Equipment for Effective Lighting
Having the right tools is critical for implementing effective lighting techniques in your video production. Below are recommendations for equipment that can help you achieve optimal lighting results.
Recommended Lighting Gear for Beginners
For those new to video production, investing in basic lighting gear can significantly improve your content. Softbox lights, ring lights, and LED panels are excellent options that provide versatility and ease of use. These tools allow you to create various lighting setups without needing extensive knowledge or experience.
Affordable Lighting Solutions for Content Creators
For content creators on a budget, there are several affordable lighting solutions available. Utilizing DIY methods, such as homemade diffusers or reflector boards, can help achieve professional-looking lighting without breaking the bank. Additionally, consider using natural light during the day when possible, as it can provide beautiful illumination without any cost.
Adjusting Lighting for Different Environments
Every shooting environment presents unique lighting challenges. Understanding how to adjust your lighting to suit these settings is crucial for achieving consistent quality.
Indoor vs. Outdoor Lighting Considerations
Indoor lighting often requires more control, as you may have to balance artificial light with existing light sources. Meanwhile, outdoor lighting can vary significantly throughout the day, so planning shoots during optimal hours, like early morning or late afternoon, can result in more flattering natural light. Always be prepared to adapt your setup based on environmental conditions.
Adapting to Different Room Sizes and Colors
The size and color of a room can greatly influence your lighting setup. Smaller rooms may require softer light to avoid overwhelming the space, while larger rooms may benefit from more robust lighting solutions. Additionally, the color of the walls can either absorb or reflect light, impacting the overall ambiance. It’s essential to evaluate these factors and adjust your lighting accordingly for the best video quality.
Conclusion
By implementing these lighting tips for video, content creators can significantly enhance the quality of their videos, ensuring that they capture and maintain their audience’s attention. Remember, effective lighting is not just about brightness; it’s about creating the right mood and atmosphere for your content. As you refine your lighting techniques, consider leveraging tools like the Lumi Notch Teleprompter for Windows & Mac to aid in your video production process. Mastering the art of lighting will undoubtedly elevate your video projects, enabling you to produce visually stunning content that resonates with viewers.
Frequently asked questions
What is the best lighting for video on a budget?
Natural window light is the best free option; position yourself facing a window. For affordable artificial light, a simple LED panel with adjustable color temperature and a softbox or diffusion sheet will soften shadows and provide consistent results. Ring lights are also popular for talking-head videos but can create unnatural catchlights.
How do I avoid harsh shadows in my video?
Use diffused light sources by bouncing light off a white wall, ceiling, or using a softbox or umbrella. Placing the main light (key light) at a 45-degree angle to your subject and adding a fill light on the opposite side helps soften shadows. Avoid placing a single, hard light directly in front of the subject.
Why does my skin look unnatural or green on camera?
This is often caused by mixed color temperatures (e.g., daylight from a window and warm incandescent bulbs in the same scene). Ensure all your light sources have the same color temperature, or use gels to match them. Also, set your camera’s white balance manually to your primary light source for accurate color rendition.
What is three-point lighting and is it necessary for beginners?
Three-point lighting uses a key light, fill light, and back light to separate the subject from the background and create depth. While it’s a professional standard, beginners can start with just a key light and a reflector as a fill. It’s not strictly necessary but understanding the concept helps improve video quality significantly.
How do I light a video at night without windows?
You’ll need to rely entirely on artificial lighting. Start with a main key light (like a large LED panel) at a 45-degree angle, add a fill light or reflector to reduce shadows, and use a back light to separate yourself from the dark background. Using practical lights (like lamps) in the scene can add depth, but match their color temperature to your key light.
Recording with a script? Try Lumi.
Keep your script near the camera and out of your final video. Try free for 3 days.
Learn more