Lighting is a crucial aspect of video production that can significantly impact the quality of your content. This guide explores various lighting setups for filming, helping content creators, video producers, and educators enhance their visual storytelling.
Understanding the Basics of Lighting
What is Lighting in Filming?
Lighting in filming refers to the controlled use of light to illuminate a scene. It encompasses the sources of light, their intensity, color temperature, and how they interact with the scene’s elements. Proper lighting can enhance the mood, highlight important features, and set the tone for the video.
Importance of Lighting for Video Quality
The quality of lighting can make or break a video. Well-executed lighting setups for filming can result in high-quality visuals that engage the audience. Conversely, poor lighting can lead to flat, dull images that detract from the viewer’s experience. Good lighting not only improves visibility but also influences the emotional response of the audience.
Types of Lighting: Key, Fill, and Backlight
Understanding the three primary types of lighting is essential for creating effective setups:
- Key Light: This is the main light source that illuminates the subject. It sets the overall tone and exposure of the scene.
- Fill Light: This light reduces shadows created by the key light, providing a softer look and more balanced lighting.
- Backlight: Positioned behind the subject, backlighting helps create depth by separating the subject from the background, adding dimension to the shot.
Essential Lighting Equipment
Types of Lights: LED, Tungsten, and Fluorescent
Choosing the right type of light is crucial for achieving the desired effect in your videos. Here’s a brief overview of common lighting types:
- LED Lights: Energy-efficient and versatile, LED lights are popular for their longevity and adjustable color temperatures.
- Tungsten Lights: Known for their warm tones, tungsten lights have been traditional favorites in film production, although they consume more power and generate heat.
- Fluorescent Lights: These lights offer soft, even lighting and are often used in professional setups but may require color correction due to their greenish tint.
Lighting Accessories: Softboxes, Diffusers, and Reflectors
To enhance the effectiveness of your lighting, consider using accessories:
- Softboxes: These diffuse light and reduce harsh shadows, creating a more flattering look.
- Diffusers: Similar to softboxes, diffusers spread light evenly across the subject.
- Reflectors: Used to bounce light onto the subject, reflectors can fill in shadows and add brightness where needed.
Budget-Friendly Lighting Options
For those on a budget, there are several cost-effective lighting options:
- Use natural light from windows during the day.
- Purchase affordable LED lights, which have become more accessible in recent years.
- DIY solutions, such as using household lamps or creating reflectors from everyday materials, can also be effective.
Common Lighting Setups for Filming
Three-Point Lighting Setup
The three-point lighting setup is a classic method used in video production. By combining key, fill, and backlight, it provides a balanced, professional look. This setup is particularly effective for interviews and talking head videos, creating depth and dimension while ensuring the subject is well-lit.
High-Key vs. Low-Key Lighting
Understanding the difference between high-key and low-key lighting can help you set the right mood for your videos:
- High-Key Lighting: Characterized by bright, even lighting with minimal shadows, this setup is ideal for light-hearted content, such as comedies or promotional videos.
- Low-Key Lighting: This technique creates dramatic shadows and stark contrasts, often used in thrillers or emotional scenes to evoke tension and mood.
Natural Lighting Techniques
Utilizing natural light can yield stunning results. Here are some tips:
- Position your subject near windows or outdoors during golden hour (early morning or late afternoon) for soft, diffused light.
- Use reflectors to bounce light onto your subject if there are harsh shadows.
- Be mindful of changing light conditions, and adjust your setup accordingly.
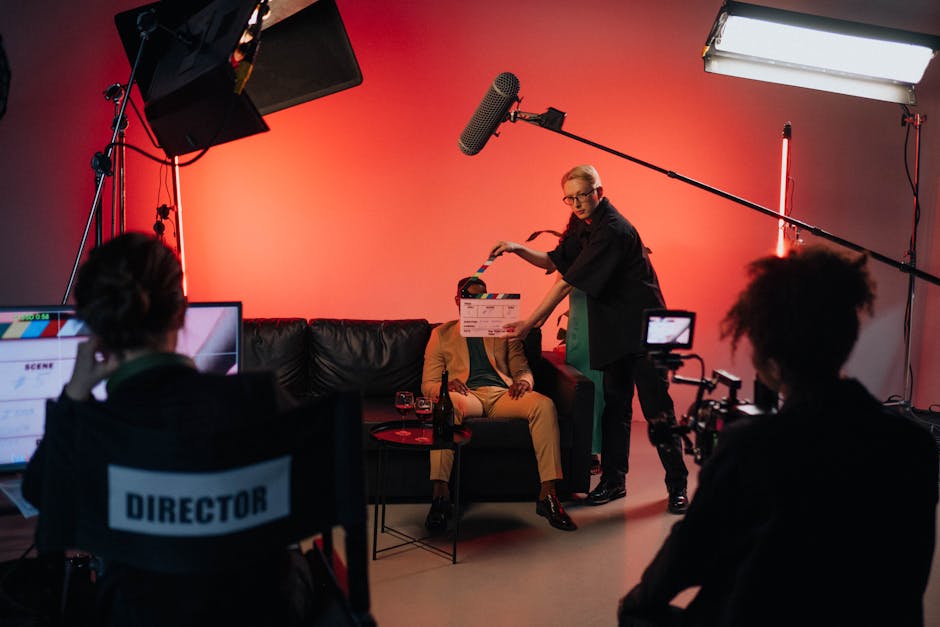
Best Practices for Lighting Your Videos
Positioning Your Lights Effectively
Light positioning is critical for achieving the desired effect. The general rule is to position your key light at a 45-degree angle from the subject and slightly above eye level. This creates natural shadows and highlights, enhancing the subject’s features.
Avoiding Common Lighting Mistakes
Some common pitfalls can negatively impact your video quality:
- Using harsh lighting that creates unflattering shadows.
- Neglecting to balance your lighting, resulting in overexposed or underexposed footage.
- Using a single light source without considering fill or backlighting.
Adapting Your Setup for Different Environments
Every environment presents unique challenges. Be prepared to adapt your lighting setup based on the location, whether it’s indoors, outdoors, or in a controlled studio environment. Experiment with different placements and configurations to find what works best for each scenario.
Lighting for Different Video Types
Interviews and Talking Head Videos
For interviews, a three-point lighting setup is often recommended, ensuring the subject is well-lit and visually appealing. Use a soft key light to illuminate the face, a fill light to soften shadows, and a backlight to separate the subject from the background.
Product Demonstrations and Reviews
When filming product demonstrations, it’s essential to ensure the product is well-lit from multiple angles. Consider using overhead lighting combined with reflectors to eliminate shadows, making the product easy to see and engaging for viewers.
Educational Videos and Tutorials
In educational videos, clear visibility of both the presenter and any visual aids is crucial. Utilize a combination of high-key lighting and softboxes to create an inviting and informative atmosphere that keeps viewers engaged.
Post-Production Lighting Adjustments
Color Grading and Correction
Even with the best lighting setups for filming, color grading and correction in post-production can enhance your video. Adjusting brightness, contrast, and color balance can significantly improve the overall look of your footage.
Using Software to Enhance Lighting
Software like Adobe Premiere Pro or Final Cut Pro offers tools for adjusting lighting levels. Use these tools to fix exposure issues or to stylize your footage according to the desired aesthetic.
Balancing Light Levels in Editing
Achieving balanced light levels in editing can ensure that your video maintains visual continuity. Look for areas that may be overexposed or underexposed and make the necessary adjustments to create a polished final product.
Future Trends in Lighting for Video Production
Smart Lighting Solutions
As technology evolves, smart lighting solutions are emerging. These systems allow for remote control and automation, enabling filmmakers to adjust lighting setups seamlessly during production.
Sustainable Lighting Practices
With a growing emphasis on sustainability, many video producers are exploring eco-friendly lighting options. This includes using energy-efficient LEDs and solar-powered lights to reduce environmental impact.
Innovative Technologies in Filming
Technological advancements continue to influence lighting in video production. Innovations such as RGB lights and programmable lighting setups offer new creative possibilities for filmmakers.
Conclusion
Lighting setups for filming are essential to creating professional-looking videos. By understanding the principles of lighting and experimenting with different setups, content creators can elevate their production quality and engage their audience effectively. For more insights into enhancing your video quality, check out our Video Recording Tips for Professionals to further refine your craft.
Perguntas frequentes
What are the basic lighting setups for filming?
Basic lighting setups typically include key light, fill light, and backlight. The key light is the primary source of illumination, while the fill light softens shadows. The backlight adds depth by separating the subject from the background.
How can I achieve a three-point lighting setup?
To set up three-point lighting, position the key light at a 45-degree angle to the subject. Place the fill light on the opposite side to balance shadows, and position the backlight behind the subject to create separation.
What types of lights are commonly used in filming?
Common lights used in filming include LED panels, softboxes, and spotlights. Each type serves different purposes, such as providing broad illumination or focused beams.
What is the role of color temperature in lighting setups?
Color temperature affects the mood and tone of a scene, measured in Kelvin. Warmer temperatures (around 3200K) create a cozy feel, while cooler temperatures (around 5600K) give a more clinical or natural appearance.
How can I control shadows in my lighting setup?
To control shadows, adjust the position and intensity of your lights. Using diffusers can soften shadows, and adding fill lights can help illuminate shadowed areas without overpowering the key light.
What are some tips for lighting outdoor scenes?
For outdoor scenes, consider using reflectors to bounce light onto your subject. Additionally, be mindful of the sun’s position to avoid harsh shadows and glare.
How do I choose the right lighting equipment for my project?
Selecting lighting equipment depends on your project’s needs, budget, and location. Consider factors like portability, power sources, and the type of look you want to achieve.
Can I use natural light effectively in my filming?
Natural light can be very effective, especially during golden hour. However, it may require additional tools like reflectors or diffusers to control intensity and direction.
Recording with a script? Try Lumi.
Keep your script near the camera and out of your final video. Try free for 3 days.
Learn more