A teleprompter for video formats is really a set of decisions about how your script meets the screen, the lens, and the shot you are trying to capture. Video formats vary more than ever, from vertical social clips to broadcast-style presentations, and each one places different demands on reading distance, pacing, and script layout. Choosing the right approach keeps your delivery smooth, your pacing natural, and your audience engaged instead of watching you search for the next line. This guide walks you through the practical decisions—script layout, scrolling behavior, device setup, and workflow tips—so you can pick an approach that fits your production and speak with confidence on camera.
Before you buy a stand or download another app, it helps to think in terms of the format you are shooting first and the gear second. The prompter is a supporting tool, and the best tool is the one that disappears from your attention once the recording starts. Everything below is organized around that idea: decide the format, shape the script to match it, then choose hardware and a workflow that reinforce natural delivery rather than fight it.
Why Video Format Shapes Your Teleprompter Choice
The aspect ratio and shot type of a video quietly determine where your eyes need to be, how far you sit from the text, and how quickly the words should move. A wide presentation frame with a lectern gives you room for a large confidence monitor, while a tight vertical clip shot on a phone leaves very little space for readable text. If you ignore those constraints, you end up fighting the setup: leaning forward, dropping your eyeline, or rushing to keep up with a scroll that was tuned for a different take. Treating format as the starting point is the single most useful habit you can build, because it turns an abstract gear question into a concrete production question.
How aspect ratio affects script layout
A 9:16 frame crops your world vertically, so a wide monitor or tablet sitting below the lens quickly falls outside a comfortable reading cone, while a 16:9 frame gives you more horizontal room to keep text at eye level without crowding the edges. Wider formats let you use longer line lengths without your eyes traveling far between lines, which tends to make delivery feel calmer. Narrower formats push you toward shorter lines and more frequent breaks so your gaze stays close to the lens. Adjust line length and text size to the frame you are actually cutting for, not the frame you happen to be most used to shooting.
Reading distance and screen position
The distance between your eyes, the text, and the lens drives how natural you look on camera, and this changes significantly between a phone rig and a studio setup. If the prompter sits far below the lens, viewers will see your eyes drifting downward line after line, which reads as disengagement even when your delivery is strong. Placing the text as close to the lens axis as your hardware allows keeps the eyeline convincing while still letting you read comfortably. On compact rigs, this often means slightly smaller text and a shorter scroll column, while larger studio setups can afford generous text placed at true eye height.
Matching scroll speed to shot length
Scroll speed is pacing, and pacing should follow the length and purpose of the shot rather than a default setting you never touch. A thirty-second vertical clip generally needs brisk, forward motion so you do not run out of momentum, while a five-minute interview segment needs a slower, conversational rhythm that leaves room for emphasis and natural pauses. If the speed feels rushed, you will start skimming ahead with your eyes, which pulls focus away from the lens. Rehearse the actual segment at your intended speaking pace, mark where it should end, and set the scroll so it lands there comfortably.
Formats That Work Best with a Teleprompter
Different productions reward different prompting setups, and recognizing which category you are in narrows the field immediately. Interviews, presentations, and vlogging each have their own reading conditions, participant counts, and movement patterns, so a solution that shines in one can feel clumsy in another. The three most common scenarios below are worth studying because most content work eventually lands in at least one of them. Use them as templates: identify the closest match, then adapt the details to your own script and space.
Teleprompter for interviews: multi-person setups
Interviews are the hardest prompter scenario because more than one person may need to read, and the conversation must still feel spontaneous. A teleprompter for interviews typically relies on flexible eyeline placement and remote control so a producer can nudge the scroll while the host and guest stay focused on each other. Shared questions or talking points often work better than verbatim answers here, since rigid scripting can flatten the back-and-forth that makes interviews compelling. If your participants sit at different heights or angles, plan the text position per seat rather than assuming one placement serves everyone equally well.
Teleprompter for presentations: slides and speaker notes
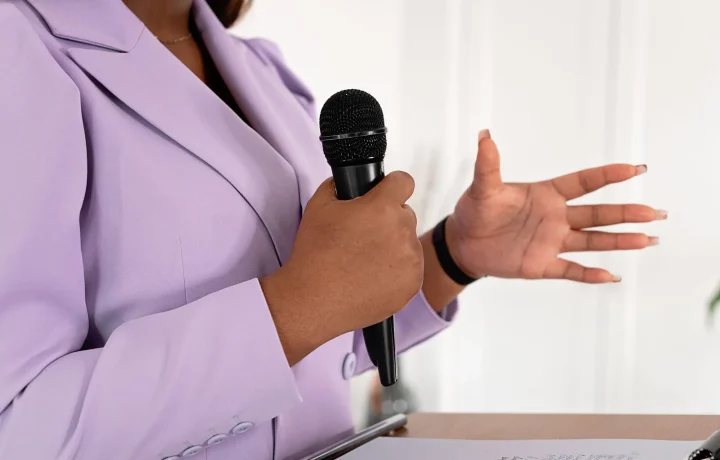
In presentation settings the prompter has to coexist with slides, clickers, and an audience that can see your eyes from across a room. A teleprompter for presentations usually favors large text, clear paragraph breaks, and a confidence monitor positioned so your eyeline stays reassuring rather than fixed downward. Because your attention is split between stage movement and delivery, shorter cue blocks with visible transitions tend to outperform dense paragraphs. It is also worth checking your slide build order against the script so a slide change never lands mid-sentence.
Teleprompter for vlogging: handheld and selfie-style shooting
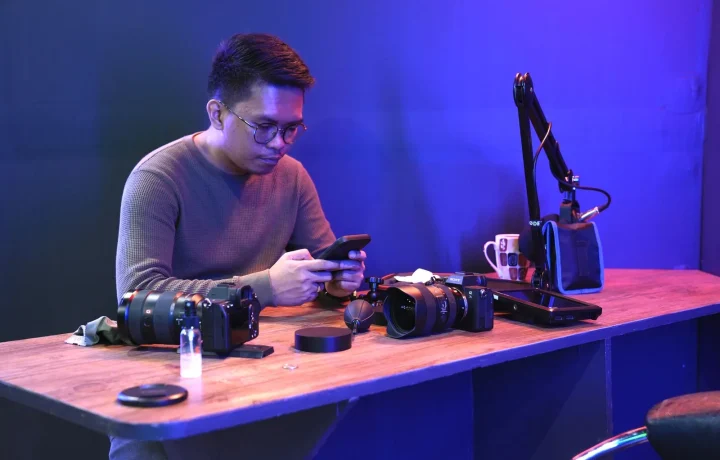
Vlogging compresses everything: limited space, close framing, and often a single take before the moment passes. A teleprompter for vlogging works best when it is compact enough to keep text near the lens, because even a small eyeline drop is obvious at arm’s length. Many vloggers use an app on a phone mounted just behind a small beam splitter, or a lightweight clip-on rig for run-and-gun shooting. Keep the script loose and conversational, since overly polished language tends to sound rehearsed when the camera is this close to your face.
Setting Up Your Script for Each Format
The script is where most prompting problems are actually solved, long before you touch a slider. A well-structured script compensates for imperfect hardware, gives the scroll somewhere predictable to go, and lets you focus on expression instead of decoding punctuation on the fly. The habits below apply across formats, but the intensity changes: short-form demands tighter phrasing, while long-form demands stronger structural cues. Treat writing for the prompter as its own craft rather than pasting a finished article into an app.
Line length, phrasing, and punctuation cues
Write in conversational sentences that match how you would explain the topic to one person, then break lines at natural breath points rather than at the edge of the screen. Punctuation does real work on a prompter: a colon, dash, or ellipsis signals a beat that your voice can express, while long unbroken clauses encourage a flat, hurried read. Keep each line roughly the same visual length so your eye does not have to re-measure every time it returns to the left margin. When a phrase is genuinely difficult to say aloud, rewrite it instead of hoping delivery will rescue it.
Chunking content for short-form vs. long-form
Short-form clips benefit from content organized into compact blocks that can be reordered or trimmed without breaking the argument, while long-form pieces need clear section markers so you always know where you are. For a vertical clip, one idea per block usually keeps attention high; for a longer interview or presentation, blocks can expand into a full paragraph with a signposted transition at the end. Chunking also makes multi-format repurposing far easier, because you can lift a single block and drop it into a different take. Decide your block boundaries during outlining, and the scroll will feel far more predictable during recording.
Adding pauses and emphasis markers
Insert explicit pause markers—such as a line break, a slash, or a short note like pause—where you want silence to do the talking. Emphasis cues help too: a capitalized word or a brief note like slower here reminds your future self to land the point instead of drifting past it. These markers are especially valuable in vertical short-form, where a single well-placed beat can be the difference between a scroll-stop and a swipe. The goal is to give the delivery a map rather than a script that reads as a wall of identical text.
Choosing Hardware and Software That Match Your Format
Once format and script are settled, hardware selection becomes straightforward: buy for the eyeline, the space, and the way you actually work. Some setups put glass between you and the lens, others keep the text on a screen beside or behind the camera, and each approach trades off cost, setup time, and realism. Capabilities vary considerably between tools, and features that sound similar on a product page can behave differently in practice, so it is worth consulting public sources and vendor documentation before committing. Your reading of the guide Mastering Teleprompter Usage also provides a useful foundation for comparing options on equal terms.
Beam splitter vs. app-based prompting
A beam splitter places semi-transparent glass in front of the lens so the text appears exactly where you want the viewer to believe you are looking, which is ideal for close framing and polished interviews. App-based prompting runs on a phone, tablet, or laptop and is far cheaper and faster to set up, making it a strong choice for presentations, tabletop work, and casual vlogging. The trade-off is eyeline: unless the screen sits directly behind or beside the lens, viewers may notice your gaze drifting. Many creators end up using both, with a beam splitter for hero footage and an app for b-roll, cutaways, and quick solo recordings.
Autoscroll, voice-follow, and remote control options
Autoscroll is the standard mode and rewards careful speed setting, while voice-follow advances text based on your speech so the pace adapts when you improvise or add a sentence. Remote control—whether a handheld clicker, foot pedal, or paired watch—lets you pause for emphasis, skip a block, or restart a take without breaking eyeline. Not every tool includes every feature, and the quality of voice-follow in particular varies widely depending on microphone placement and room noise. Choose the control method that matches your workflow: solo shooters usually prefer a remote, while multi-person setups often benefit from a producer driving the scroll.
Mirrored text and compatibility checks
Any setup that reflects text through glass requires mirrored display, and forgetting this is one of the most common setup failures in the category. Check that your software supports flipping the text horizontally, that your device handles the aspect ratio you are shooting, and that external remotes pair reliably with your OS. Also confirm file handling: some tools import plain text well but mangle headings or special characters from documents. Spend ten minutes verifying these details during setup rather than discovering them once the camera is rolling.
A Step-by-Step Workflow Before You Record
A consistent pre-roll routine turns prompting from a source of anxiety into muscle memory, and it does not need to take long. The three steps below form a compact checklist you can run before every session, regardless of format. Doing them in order matters, because each step surfaces issues the previous one could not reveal.
Rehearse at target delivery speed
Read the script aloud at the pace you intend to deliver, not silently, because silent reading always feels faster and hides breath problems. Time the pass and note where you run out of air or stumble over phrasing, then rewrite those spots instead of simply slowing the scroll to compensate. Repeat until the words feel familiar enough that you can glance at the lens between lines without losing your place. This single habit prevents most pacing problems before equipment is even involved.
Test framing, eyeline, and lighting
Record a few seconds of yourself reading and watch it back specifically for eye position: your gaze should appear to rest on or just beside the lens, not below it. Check that the prompter is not casting a reflection or spill onto your face or background, and that the text is readable without squinting under your key light. Framing matters too, since a tighter crop reduces the margin of error for eyeline and text placement. Adjust the physical setup now, while changes are cheap and the take has not been recorded yet.
Record a test take and adjust
Shoot a full test take at your planned length and review it with sound on, paying attention to pacing, audible breaths, and whether any blocks feel rushed or padded. Note scroll drift, moments where you looked away, and any wording that sounded more formal out loud than it read on screen. Make one or two targeted changes—speed, text size, or a rewritten paragraph—rather than overhaul everything at once. Then record again; usually the second take confirms the fix and you are ready for the real one.
Common Issues Across Video Formats and How to Fix Them
Most prompting problems repeat across formats even when their causes differ, which means a small troubleshooting vocabulary goes a long way. The four issues below cover the overwhelming majority of bad takes we see in practice, and each has a fix that costs time rather than money. Diagnose by watching your test take with fresh eyes, then apply the matching remedy.
Eye darting and monotone delivery
Eye darting usually signals text that is too small, placed too far from the lens, or scrolling faster than you can comfortably read, forcing your eyes to jump and hunt. Enlarge the text, shorten the line length, and reposition the screen closer to the lens axis before touching anything else. Monotone delivery often traces back to a script with no punctuation cues or pause markers, so the read becomes one unbroken stream. Add breath points, emphasis notes, and section breaks, then rehearse aloud so your voice has somewhere to go.
Scroll speed drifting out of sync
Drift happens when your natural speaking pace differs from the preset speed, and it compounds as a take grows longer—you either fall behind and chase the text or finish early and stall. Rehearse with the actual scroll running, then adjust in small increments rather than jumping to a new value. If your delivery varies by section, consider voice-follow or a remote so you can correct on the fly. For interviews and multi-person segments, having a producer control the scroll is often the simplest fix of all.
Text size and contrast problems on small screens
Small screens magnify every contrast mistake: low-contrast text forces squinting, which changes your facial expression and pulls the eyeline off axis. Use a dark background with high-contrast text, avoid thin font weights, and test readability at the actual distance you will sit from the screen. Bright studio lighting can wash out a tablet, so check the display under your final lighting rather than in a dim room. If the text still feels cramped, the format may be asking for shorter lines rather than smaller type.
Handling cuts and b-roll interruptions
When a shoot involves cuts, b-roll, or pickups, restarting from the top of a long block wastes time and breaks your rhythm, so mark clean re-entry points in the script. Short, self-contained segments let you jump back in mid-thought without a visible mismatch in energy or volume. Keep a separate take sheet with block numbers so you always know which section is rolling. This structure also makes editing faster, since each block arrives as a self-contained, usable clip.
Adapting the Same Script for Multiple Formats
Most teams do not write one script for one format; they write a core message and shape it repeatedly for different channels. The prompter supports that process when your blocks are modular and your cues travel with the text. Related reading such as How to Use a Teleprompter for Various Video Formats Effectively and Understanding Teleprompters for Video Formats: A Complete Guide expands on the same cross-format logic from different angles. Treat adaptation as editing with intent rather than mechanical trimming.
Repurposing long-form content into vertical clips
Start from the blocks with the clearest standalone payoff, then tighten phrasing so the point lands inside a few seconds of scrolling. Vertical clips reward a fast hook at the top, so move the strongest claim forward and defer background context to a caption or a longer cut. Because your reading speed effectively increases in short-form, shorten lines and add firmer pause markers so you do not feel rushed. If a block needs more than a sentence or two to make sense, it probably belongs in the long-form version instead.
Keeping messaging consistent across platforms
Consistency comes from locking the key phrases, claims, and calls to action before you start trimming, so every version carries the same anchors even when the surrounding sentences change. Maintain a master script with designated core lines, then note which parts are optional for shorter cuts. This prevents the drift that happens when each platform cut is rewritten from scratch and the message subtly mutates. It also makes review easier, because stakeholders can approve the anchors once rather than every edit.
Maintaining a natural tone when trimming
The risk of heavy trimming is a stilted delivery, because removed transitions can leave sentences colliding without a conversational bridge. Read every trimmed version aloud and listen for abrupt jumps, then restore a short connective phrase where needed. Keep contractions and everyday wording intact, since formal phrasing becomes more obvious when the camera is close. Natural tone survives trimming best when the cuts land at breath boundaries rather than in the middle of a thought.
Conclusion
The right teleprompter for video formats is less about expensive gear and more about aligning script structure, scroll behavior, and device setup with the format you are shooting. Whether you are producing interviews, presentations, or vlogs, a short rehearsal and a test take will surface most issues before recording. Start by defining the format and shot, shape the script to match its constraints, then choose hardware that keeps your eyeline honest and your pacing comfortable. Use the steps above as a repeatable checklist, adapt as formats change, and let the technology support your delivery rather than drive it. If you want to go deeper on technique, the related guides on step-by-step workflows, best practices, and avoiding common mistakes cover the details behind each step.
Frequently asked questions
Can you use a teleprompter for vertical short-form video like Reels, Shorts, and TikTok?
Yes, but vertical framing is less forgiving: the glass or screen must sit as close to the lens as possible, since even a small offset makes your gaze look off-center in a tight portrait crop. Short-form scripts are also short, so use a large font, a slow speed, and keep the whole script visible at once instead of relying on continuous scrolling.
How do you avoid looking like you are reading from a teleprompter on camera?
Place the prompter as close to the lens as you can, enlarge the text so your eyes barely move, and set the scroll speed slightly slower than your natural pace so you are never chasing the words. Writing the script in conversational language rather than formal sentences also helps, because you will deliver it like speech instead of recitation.
What is the difference between using a teleprompter for live streaming versus pre-recorded video?
Live streaming demands an operator or foot pedal controlling scroll speed in real time, plus a setup that can run for hours without dropping, so reliability matters more than portability. For pre-recorded video you can stop, retake, and adjust the speed freely, so a simple app on a tablet mounted near the lens is usually enough.
Do I need a hardware teleprompter, or is a phone or tablet app enough?
An app works well for talking-head videos filmed on a phone or webcam, where the small distance between screen and lens keeps your gaze close to center. For multi-camera shoots, wide shots, or DSLR work, a hood and beam-splitter glass mounted in front of the lens is worth the cost because it keeps eye line aligned at any distance.
How should scroll speed and text size change for different video formats?
Long-form formats like webinars and YouTube explainers do best with medium-sized text and a steady, slightly relaxed speed you can pause and resume. Short vertical clips need bigger text and slower speed because the reading window is tiny, while fast-paced ads or hype content may need higher speed with short line lengths to keep delivery energetic.
What script format works best when loading text into a teleprompter?
Most teleprompter apps import plain text or simple documents, so strip out tables, images, and heavy formatting before loading, and use short lines with clear punctuation to signal pacing. Break the script into chunks with natural pauses marked, which makes it far easier to adjust speed on the fly without losing your place.
Recording with a script? Try Lumi.
Keep your script near the camera and out of your final video. Try free for 3 days.
Learn more